Overview
A Node connects another device to PlugClaw so an agent can use capabilities provided by that device after the required approvals are granted. PlugClaw and its Gateway run on the PlugOS device. A computer or phone becomes a Node only after the appropriate Companion app connects to that Gateway.
The Gateway is the connection point between PlugClaw and an external device. The Node is the endpoint that makes device capabilities available through that connection. Depending on the Node type and its approvals, an agent may be able to check device status, send system notifications, or use the screen, camera, voice, and system commands. Supported capabilities vary by platform and version. A successful connection does not mean that every capability or operating-system permission has already been approved.
This guide uses Windows Companion to connect a Windows computer to the Gateway on a PlugOS device. Before you begin, make sure the PlugClaw Gateway is running and have Windows Companion, the WebSocket URL shown in OpenClaw Control, and the Gateway token ready.
The connection may involve two approval layers. The first is device pairing, which confirms that the Windows computer may connect to the Gateway as a trusted client. The Awaiting approval message in Windows Companion and a Pending request under Devices refer to this layer. The second is Node capability approval. After Node mode is enabled and the device declares capabilities such as screen access, camera access, or system commands, the Gateway checks whether those capabilities are allowed. Unapproved capabilities remain unavailable. A new approval request may appear later if the Node adds capabilities or expands its declared capability set.
Treat the Gateway token as a connection credential. Enter it only on trusted devices, and do not expose it in conversations, public documents, or screenshots. Approve a pairing request only after confirming the device name and source.
Download Windows Companion
On the Windows computer you want to connect, open the following page and install the appropriate Windows Companion version:
https://docs.openclaw.ai/platforms/windows/
After installation, do not guess the connection details. Obtain the Gateway information from the device running PlugClaw first.
Get the Gateway Connection Details
Open OpenClaw Dashboard from PlugClaw. In OpenClaw Control, expand the sidebar and open Overview.
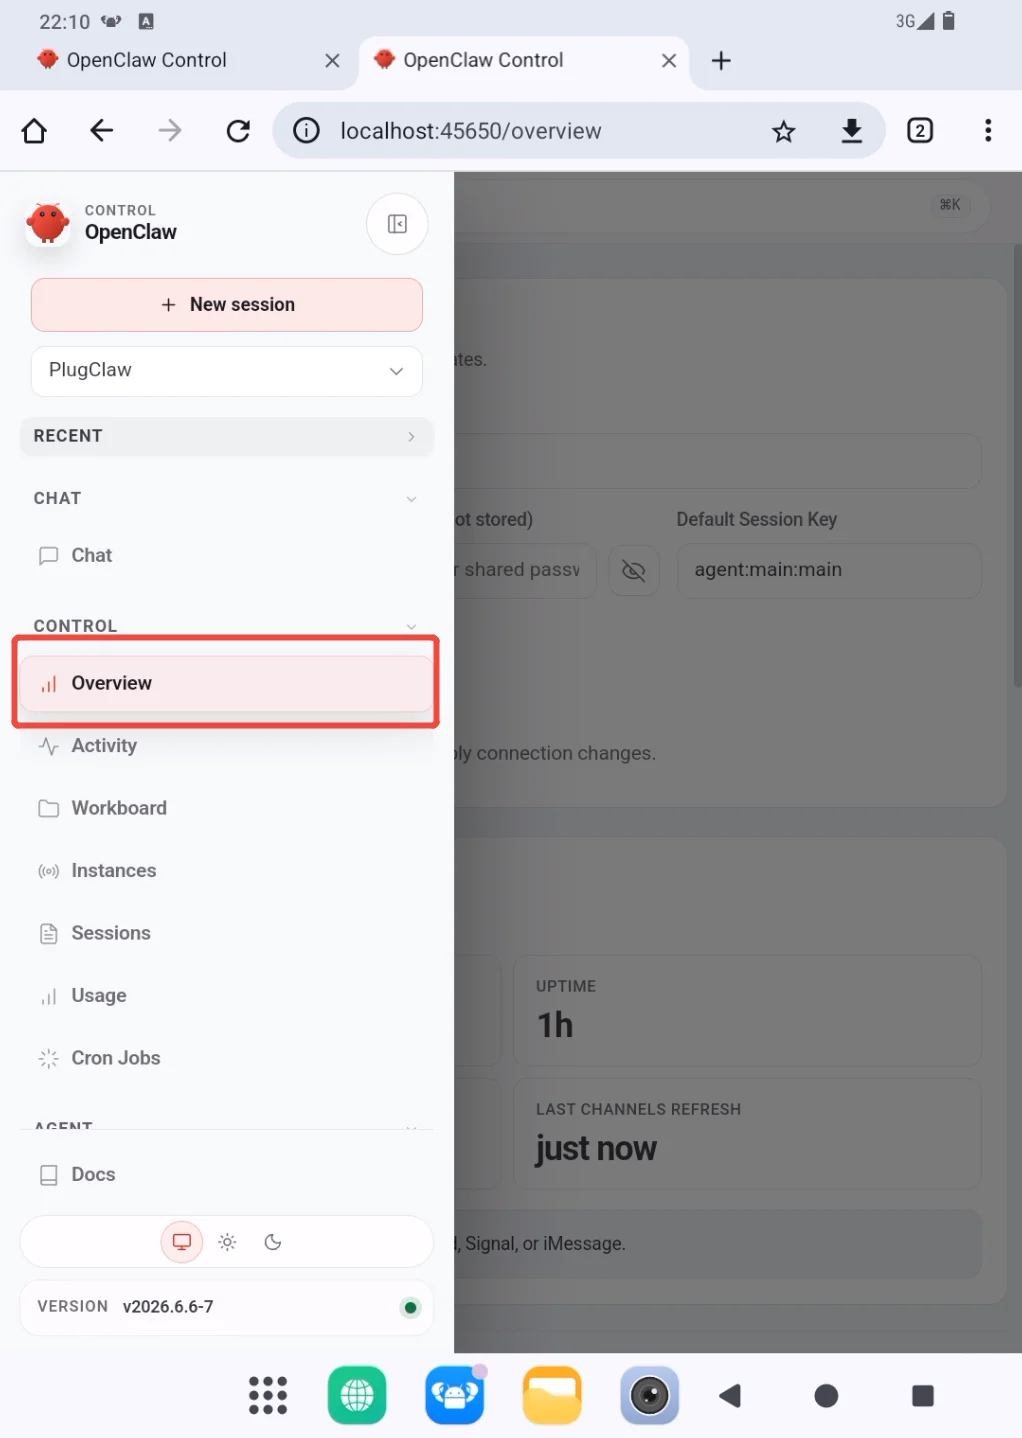
Find the WebSocket URL and Gateway token in Gateway Access. The token may be hidden by default. Reveal it only when needed, then hide it again. Do not store it in public notes or include it in troubleshooting screenshots.
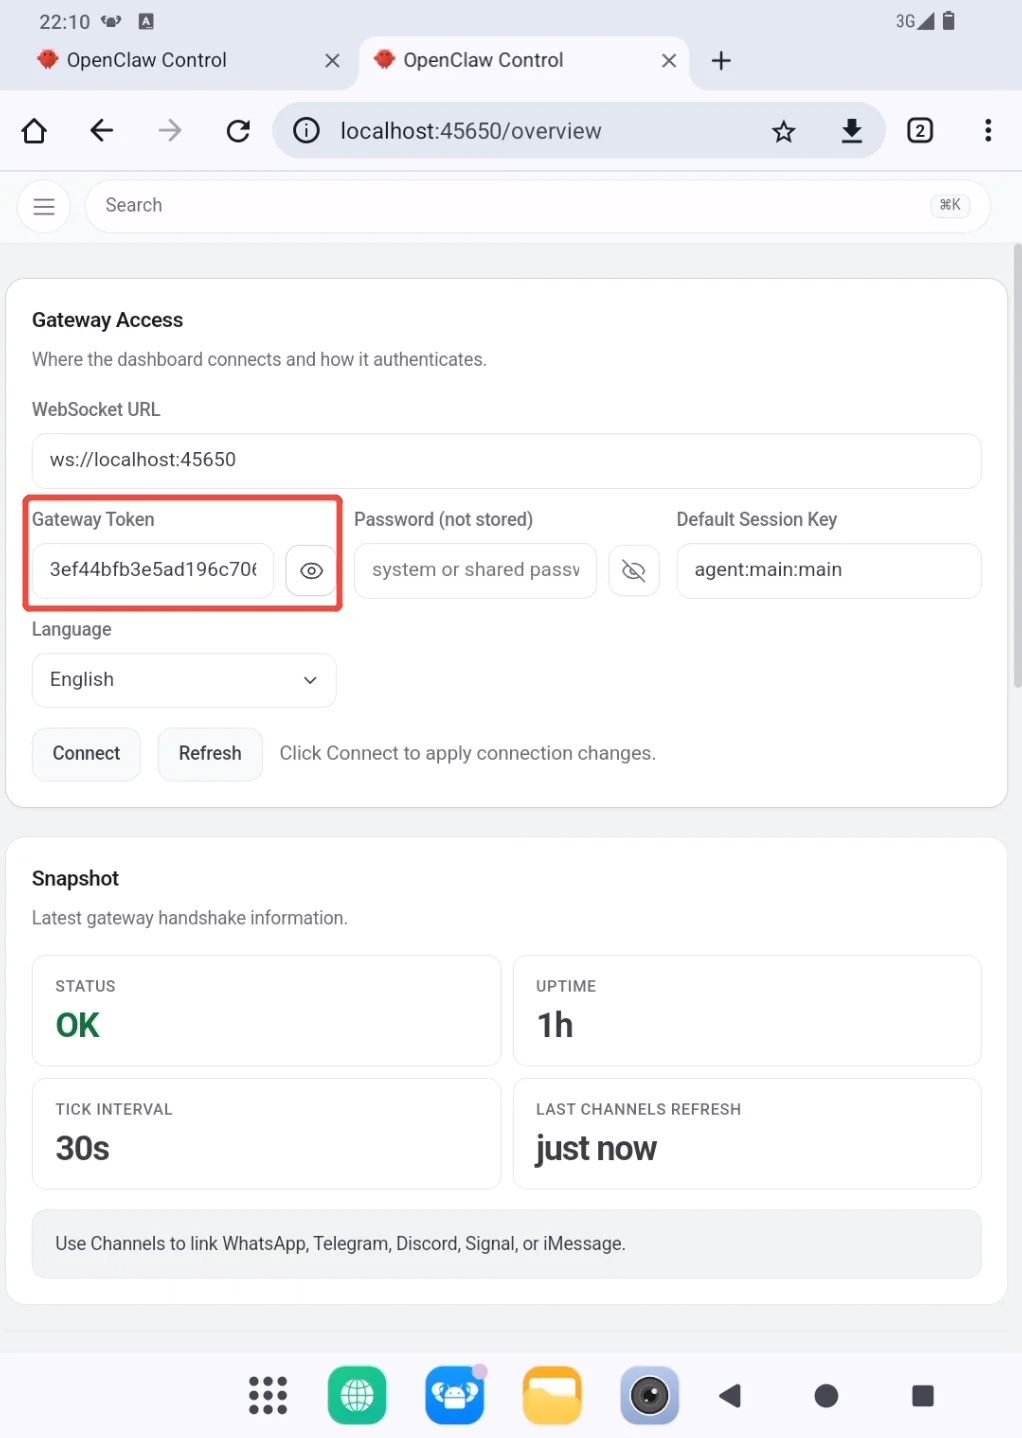
Use the WebSocket URL shown here as the Gateway URL in Windows Companion. For example, the screenshot shows:
ws://localhost:45650
Copy the complete value, including ws:// and the port. Do not change it to http:// or rebuild the address from a default port. The WebSocket URL can vary with the current Gateway configuration, so the example in this guide does not replace the value displayed on the page.
Connect to the Gateway
Open Windows Companion and go to Connection. Add a Gateway and select Direct as the connection method. Direct connection uses the Gateway URL and shared token to connect to the specified Gateway.
Enter the connection details and start the connection:
Gateway URL    The WebSocket URL shown under Gateway Access
Shared token   The Gateway token obtained in the previous step
Name           An optional display name for this Gateway in Windows Companion
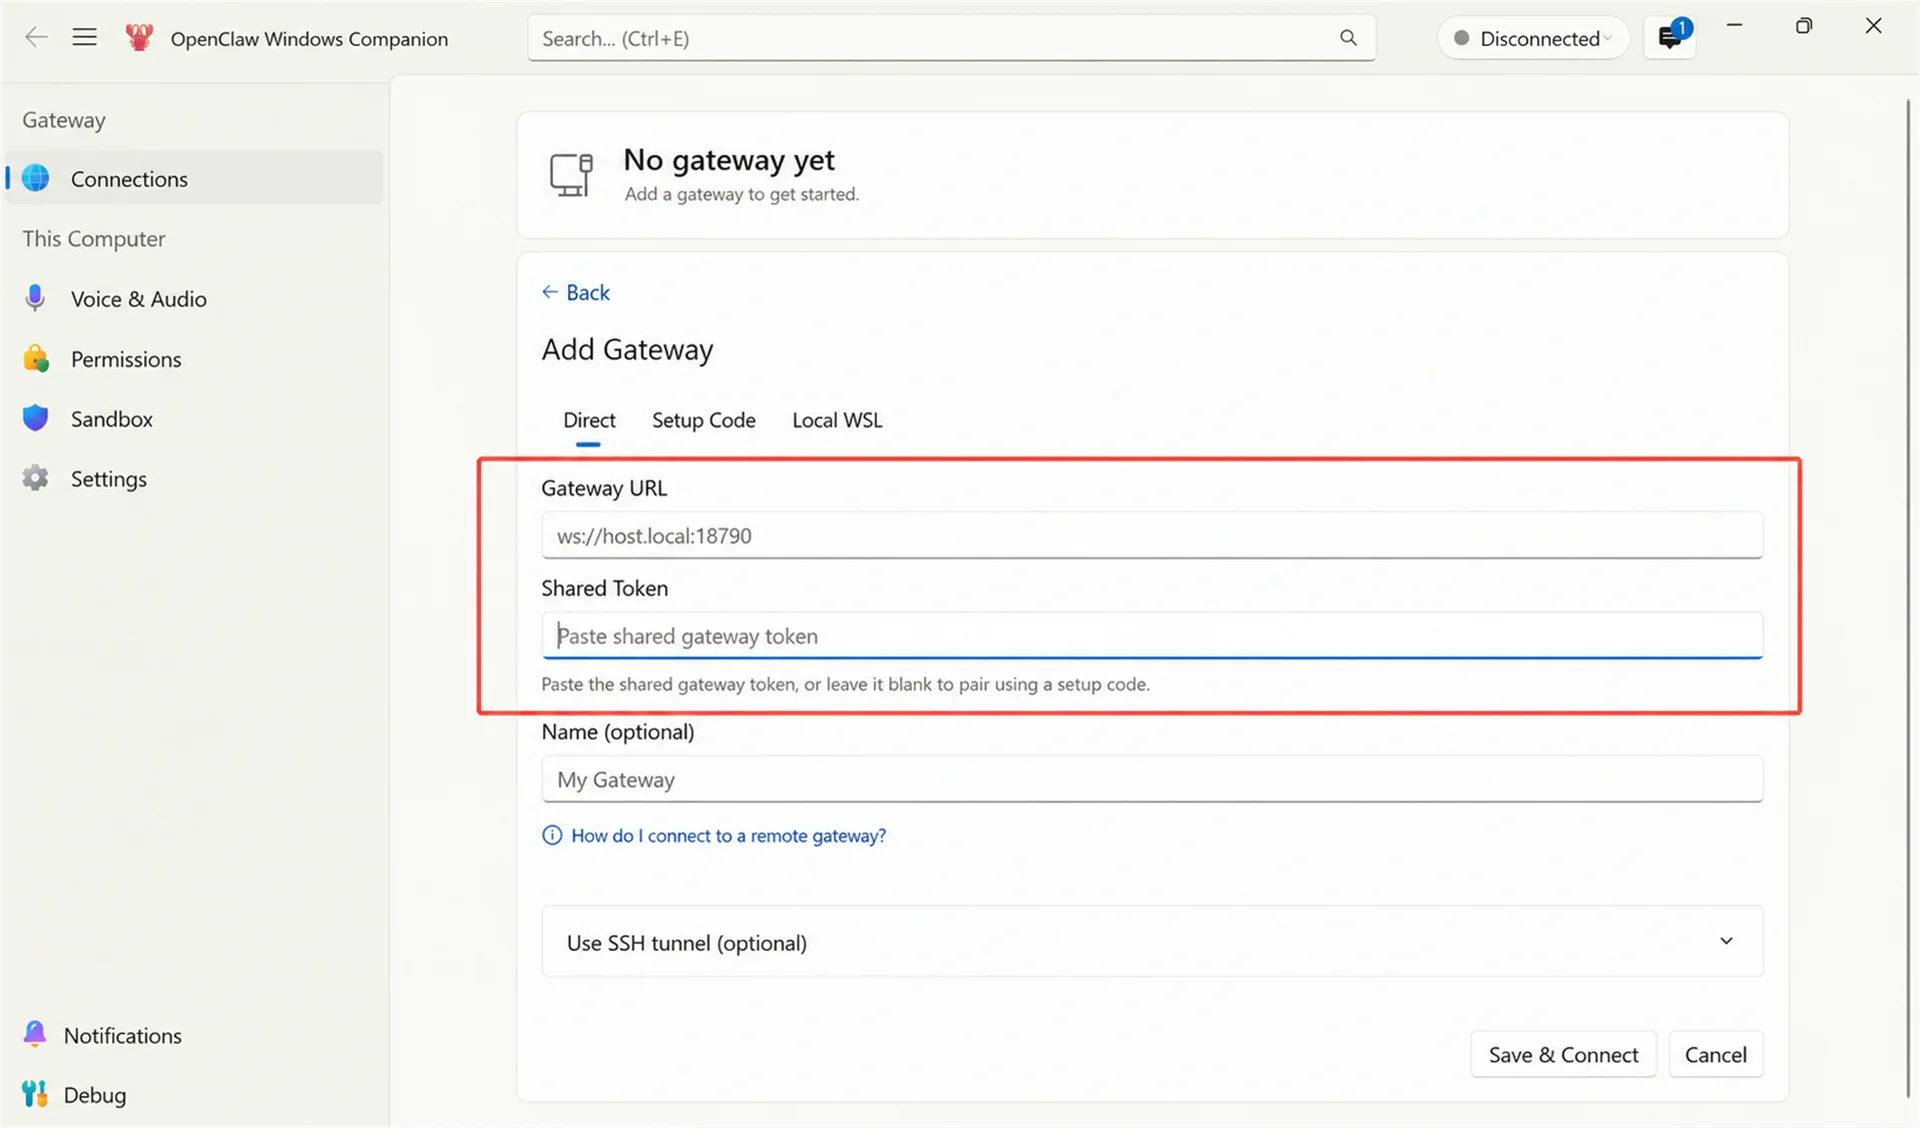
Windows Companion then sends a device-pairing request to the Gateway. The Windows computer does not yet have permission to connect, so return to OpenClaw Control to approve the request.
Approve Device Pairing
Open Nodes in OpenClaw Control.
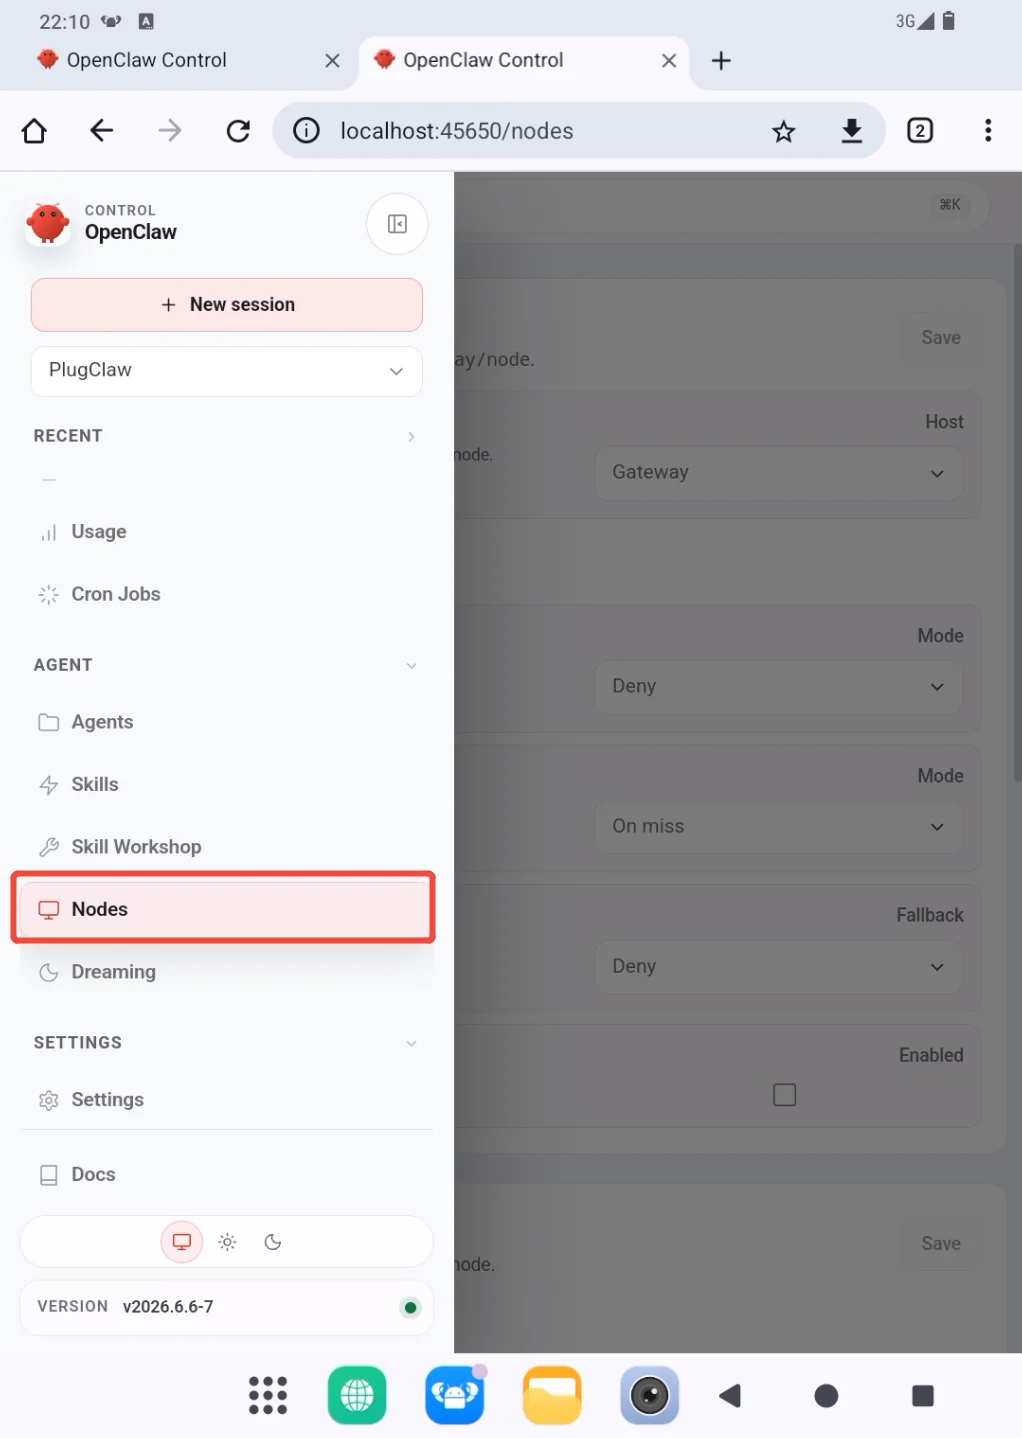
Under Devices, find the Windows Companion with a Pending status. Check its device name, address, and request time. If it matches the Windows computer you just configured, select Approve. Select Reject when the source cannot be confirmed.
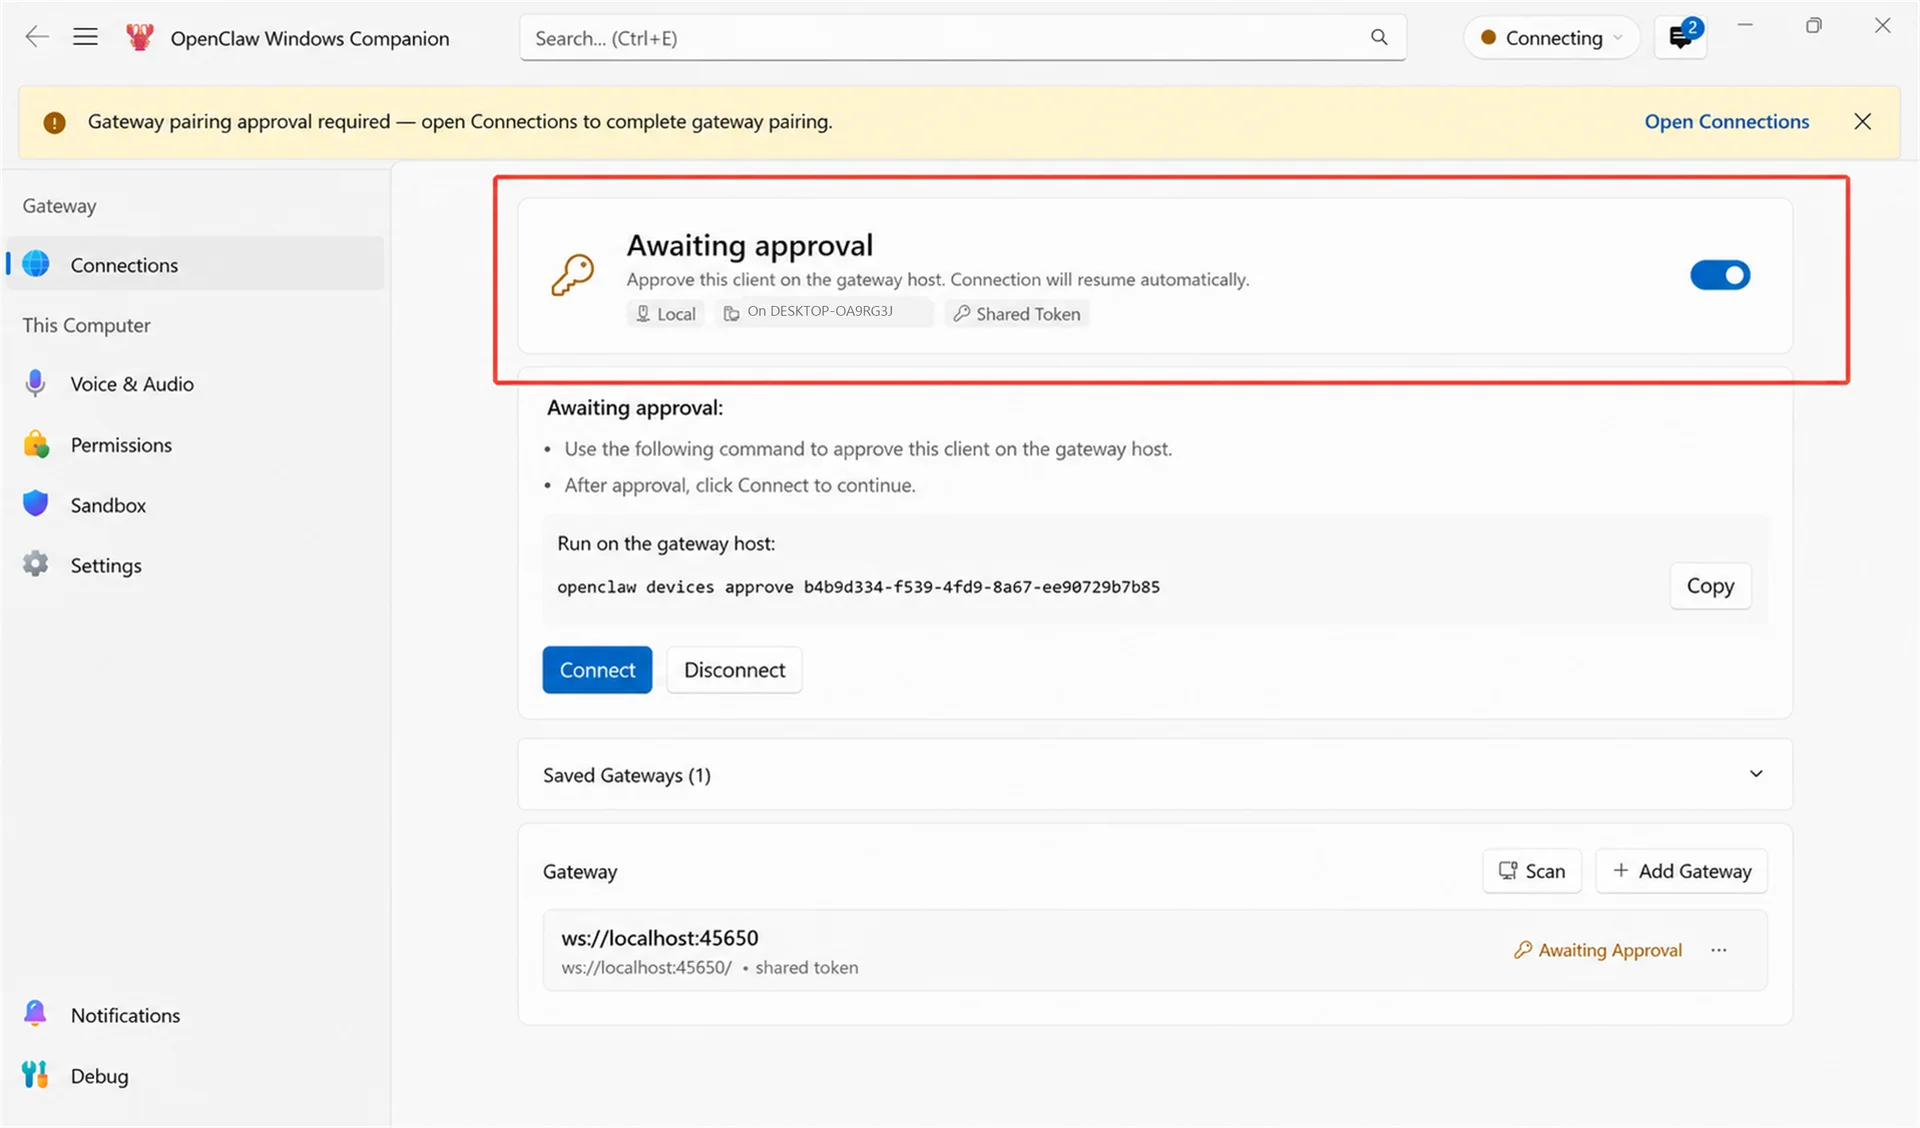
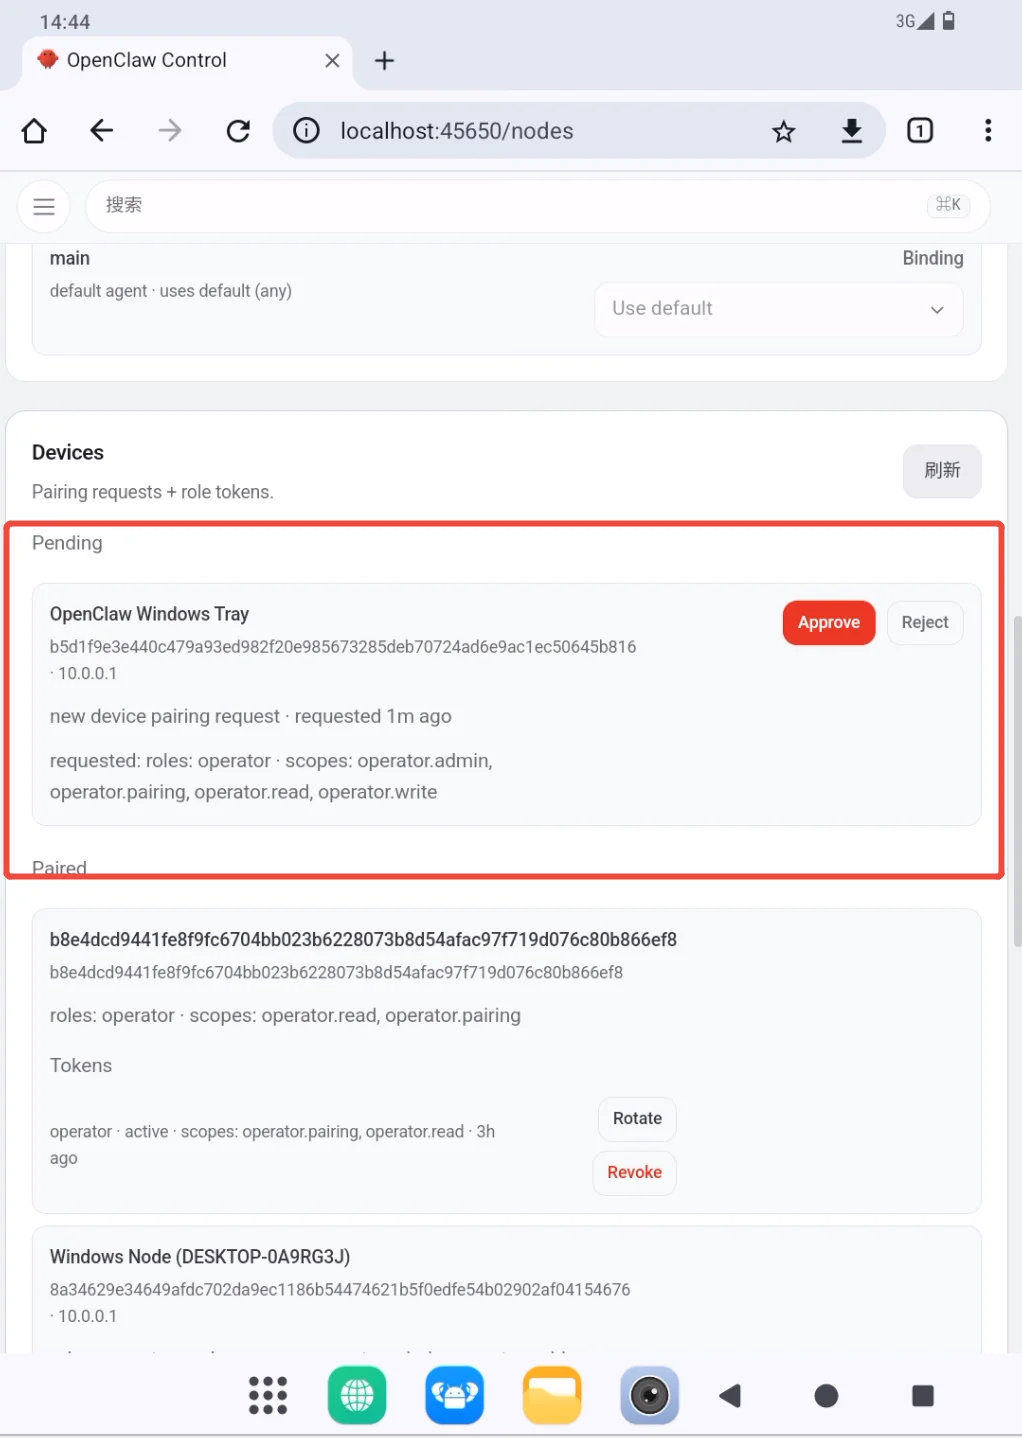
This approval allows Windows Companion to connect to the Gateway as a trusted client. It does not automatically approve screen, camera, system-command, or other Node capabilities. After Node mode is enabled, review and approve any separate capability request that appears on the Nodes page. Capabilities that have not been approved will not run.
If the device is no longer used, or its credentials may have been exposed, revoke the corresponding device or token from the Nodes page. Do not leave unknown pairing records active.
Confirm That the Node Is Available
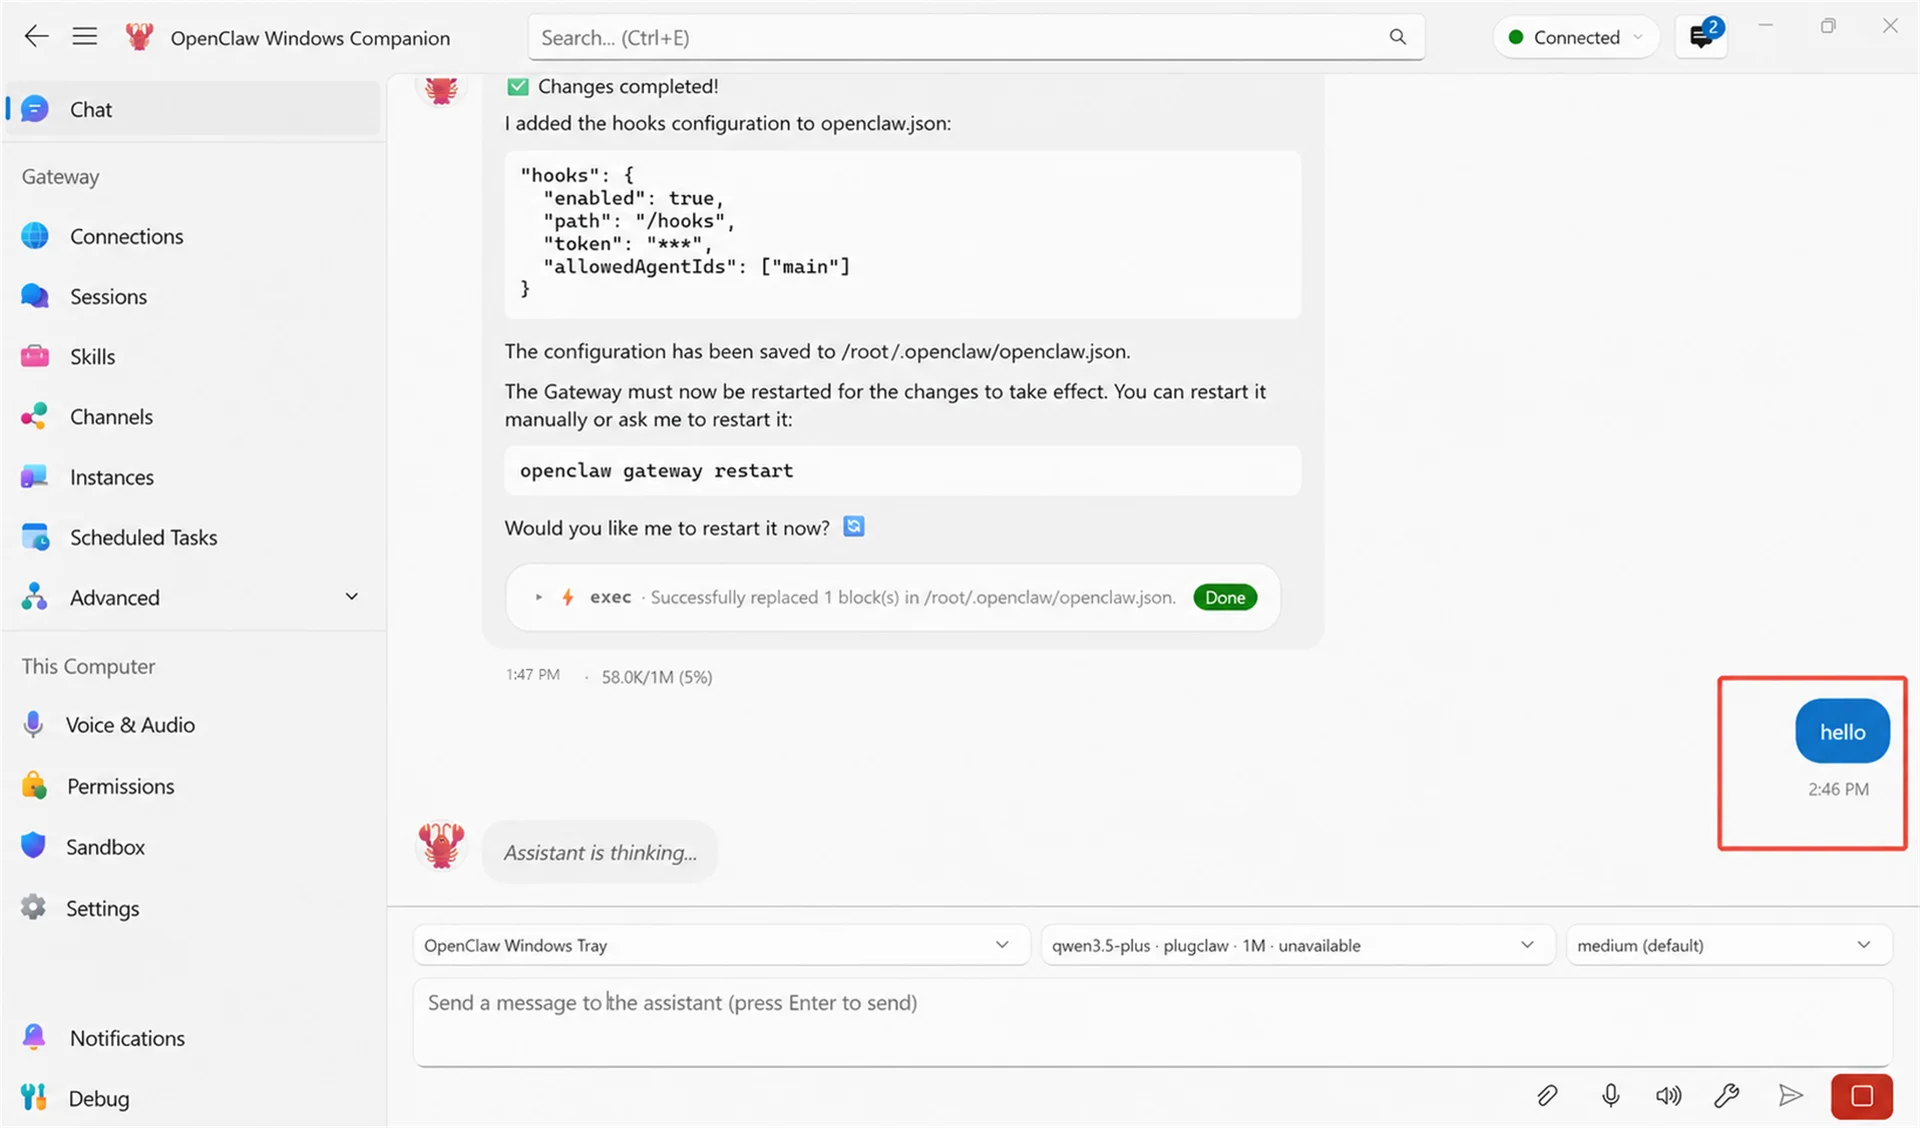
Return to Windows Companion and establish the connection. A Connected status in the upper-right corner means that Windows Companion can communicate with the Gateway.
Send a simple message from the Windows Companion chat window to confirm that it can communicate with PlugClaw.
Before using the screen, camera, voice, or system commands, confirm both that the Node capability has been approved by the Gateway and that the corresponding Windows permission is enabled. An unavailable capability does not always indicate a failed Node connection. The capability may still be awaiting approval, may not be supported by the current Node, or may be blocked by Windows permissions.
If the connection cannot be established, confirm that the Gateway is running, the value matches the WebSocket URL shown under Gateway Access, the shared token is correct, and no device-pairing request is still waiting in OpenClaw Control. If the Node is connected but a specific capability does not work, check for a pending Node capability request and confirm the corresponding Windows permission.
 PlugOS — Privacy isn't an option. It's the foundation
Secure, Ad-free, Tracking-free, No Telemetry