What You Can Do on the Conversation Page
The conversation page is the main place to use PlugClaw for tasks. Tell an Agent what you need, add further requirements, and review the result in the same conversation. Start a new session for a new task, or reopen an unfinished session from history and continue where you left off.
Session History keeps earlier conversations together. You can search by keyword and remove sessions that are no longer needed. Conversations are grouped by the Agent that handled them; a group does not appear until that Agent has received at least one message. Deleting a session removes its chat history from the list, so save any answer or file that must be kept first.
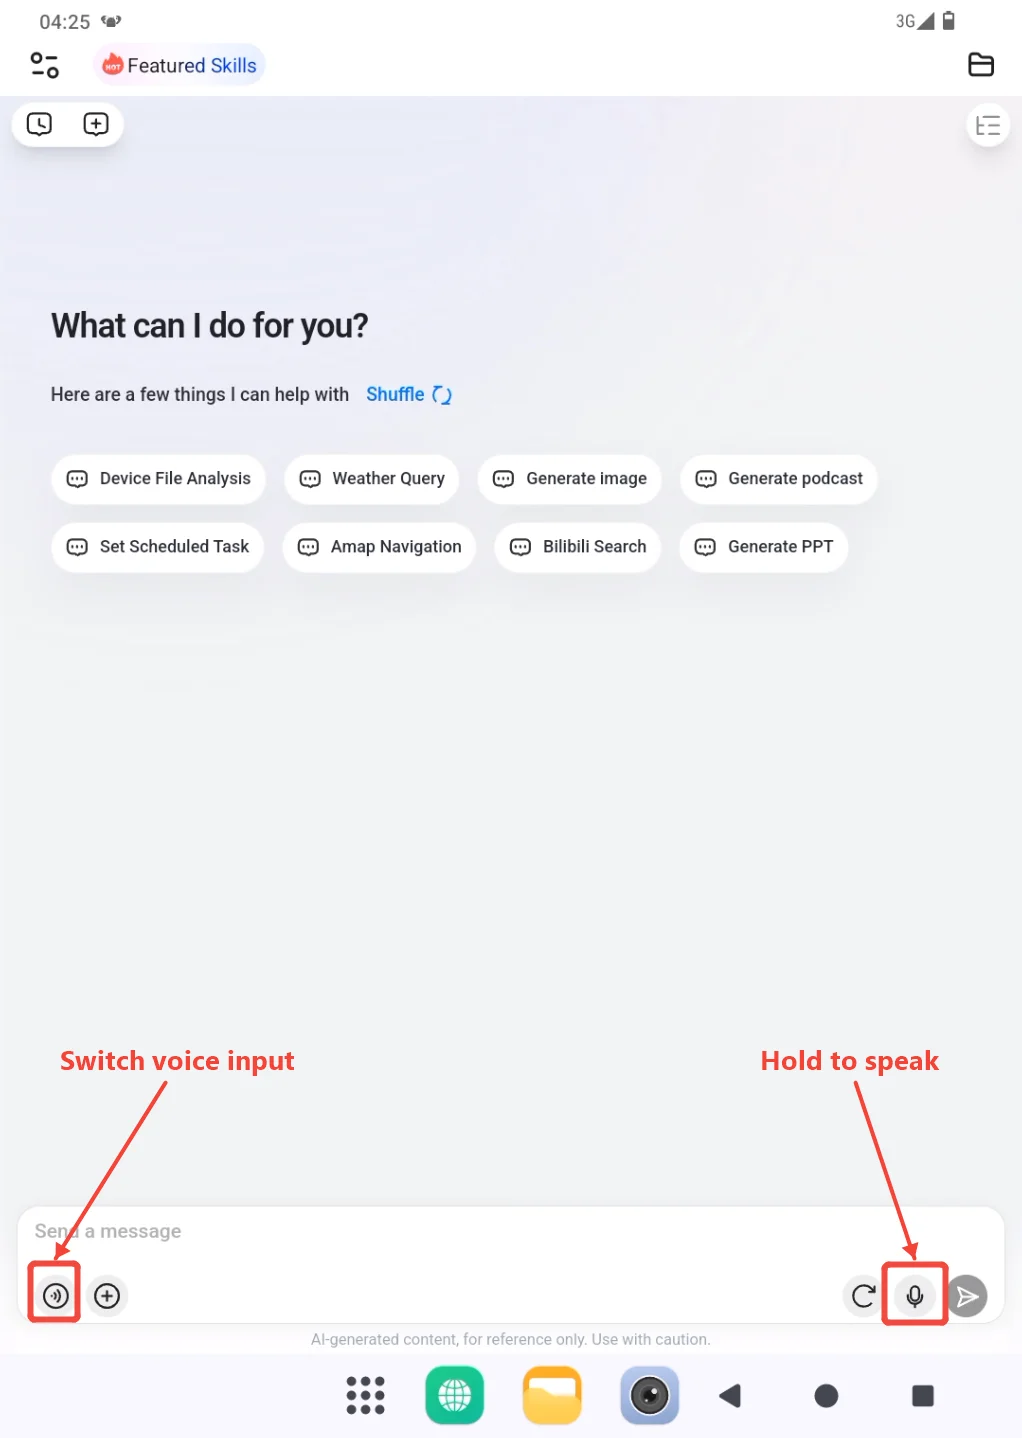
Besides typing a message, you can upload a file for an Agent to summarize, analyze, or convert. When typing is inconvenient, you can either speak and send immediately or convert speech to text, review it, and send it afterward. Turn on the device microphone in the PlugOS PC client before using either voice method.
Main Agent handles tasks by default. After creating other Agents, choose the one that best fits the task, such as a Research Agent for organizing documents or a Weekly Report Agent for summarizing project progress. See Agent Management to create an Agent. The selection process is described under Choose an Agent for a Task in this guide.
Create and Find Sessions
When starting a new task, create a session from the upper-left area of the conversation page. Describe the task in the input box and send it. After the Agent replies, the session is saved in Session History.
To continue earlier work, open Session History from the upper-left area and choose the original session under the relevant Agent group. When the list is long, enter a keyword in the search box. If an Agent has not had a conversation yet, its group does not appear in history.
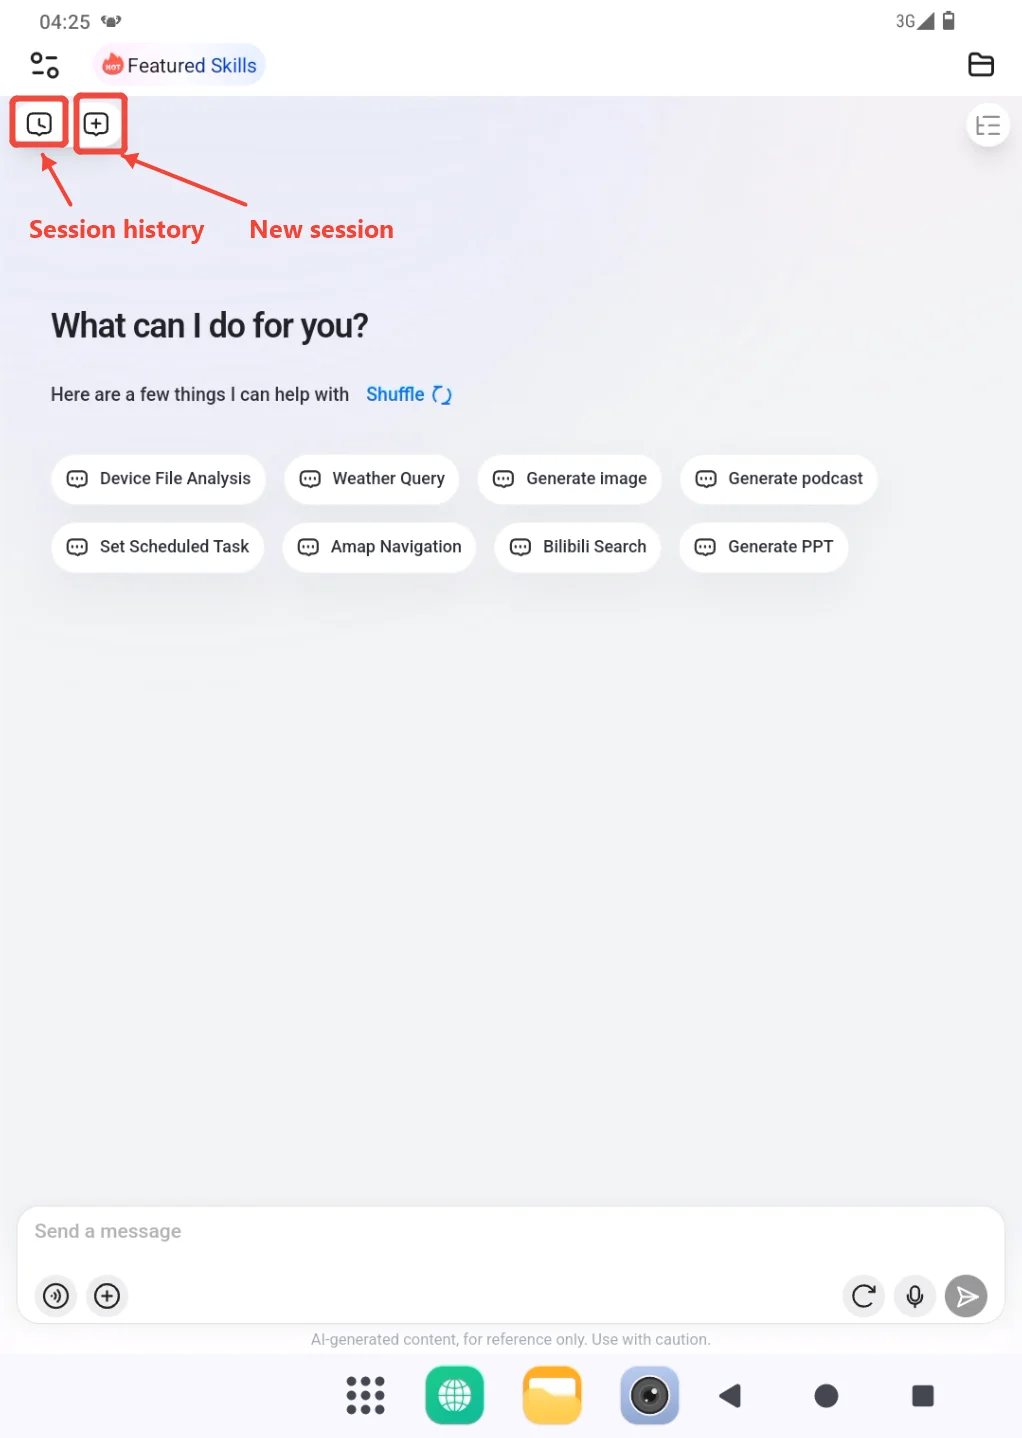
To remove a session, find it in Session History and press and hold it until the delete action appears. After you choose delete, PlugClaw asks for confirmation. Check the session name and confirm only when it is no longer needed; cancel when you are unsure.
Send Content by Voice
Before using either method below, turn on Microphone in the PlugOS PC client toolbar, then return to the PlugClaw conversation page. Voice input will not work if the device microphone has not been enabled. See PlugOS Client and Device Connection for the microphone setting.
- To send as soon as you finish speaking, use the control in the lower-left corner of the input area to switch from keyboard to voice mode. The text box changes to Hold to Talk. Hold the area while speaking and release it to send the message directly to the current session. A keyboard control then appears in the lower-left corner; use it to return to text input. Because this method does not let you review the recognized text before sending, use it carefully for names, numbers, and technical terms.
- To review the text before sending, press and hold the microphone control on the right side of the input area. When you finish speaking, the recognized text remains in the text box. Review and edit it, then send it when it is correct.
Upload a File to a Conversation
- Open the file picker from the plus control on the left side of the input box, then find and select the file you need. Check its name and contents first, and do not upload unrelated sensitive material.
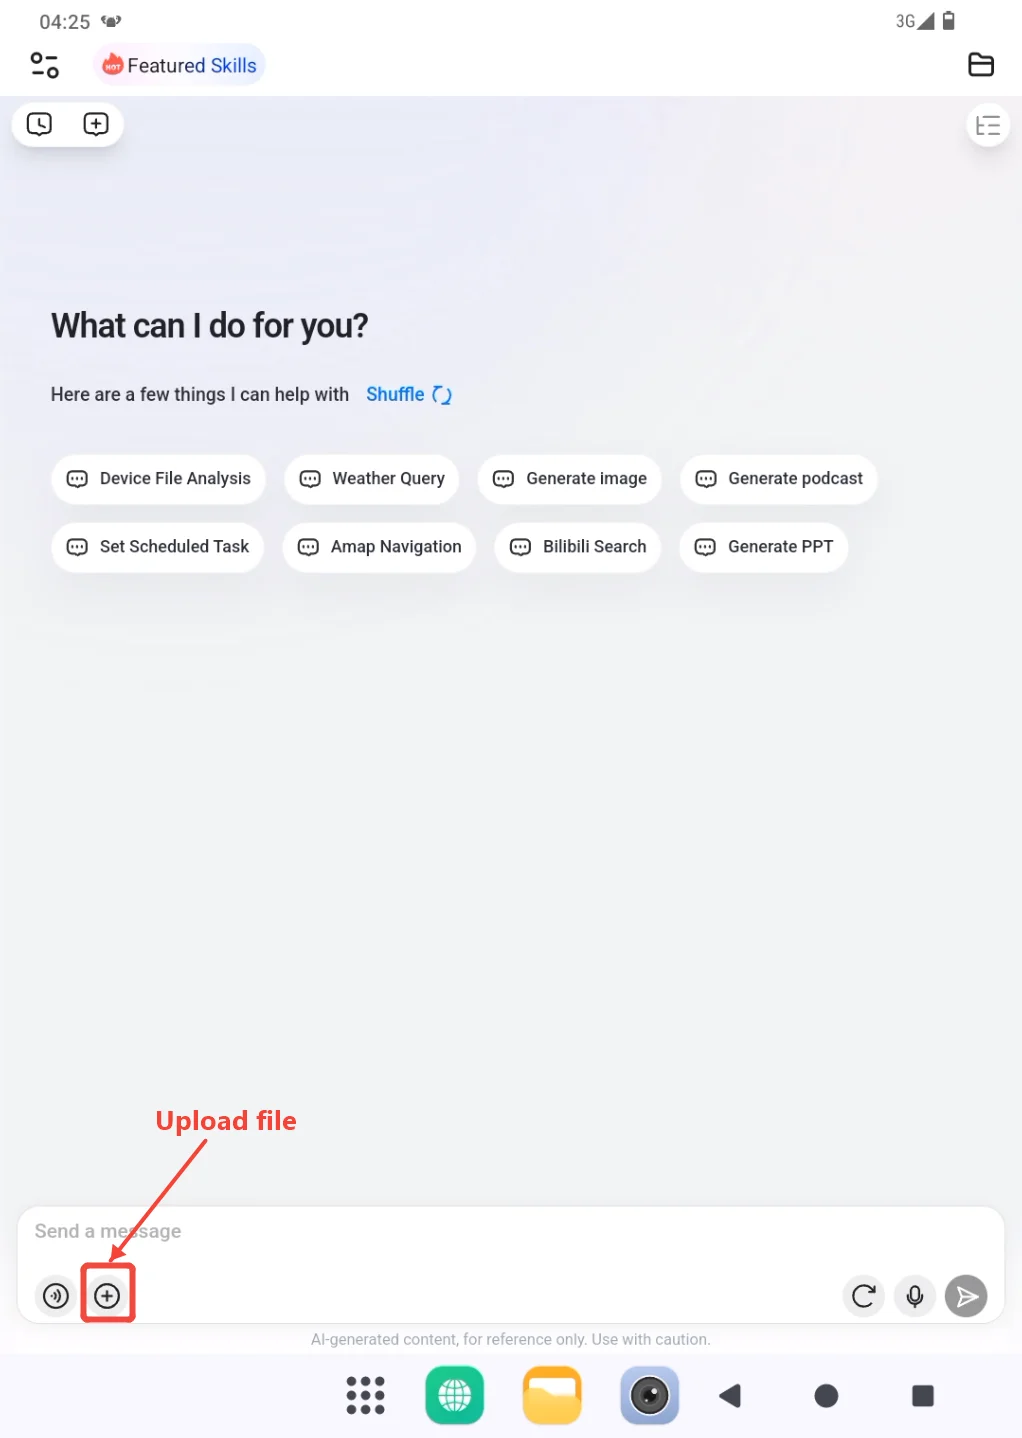
- After the file appears in the input area, add a specific instruction, such as "Summarize the three main conclusions in this file," and send it. Uploading a file without a request may leave the Agent unsure what result you want.
If the selected file does not appear, reopen the file picker and confirm that the original file is still available.
Choose an Agent for a Task
The Agent selector appears only after an Agent other than Main Agent has been created. If there is no Agent selector in the input area, Main Agent is currently the only available Agent. Create another Agent by following Agent Management, then return to the conversation page.
Select the Agent name currently shown in the input area to open the Agent list.
Choose the Agent that should handle the task and confirm that the correct name now appears in the input area.
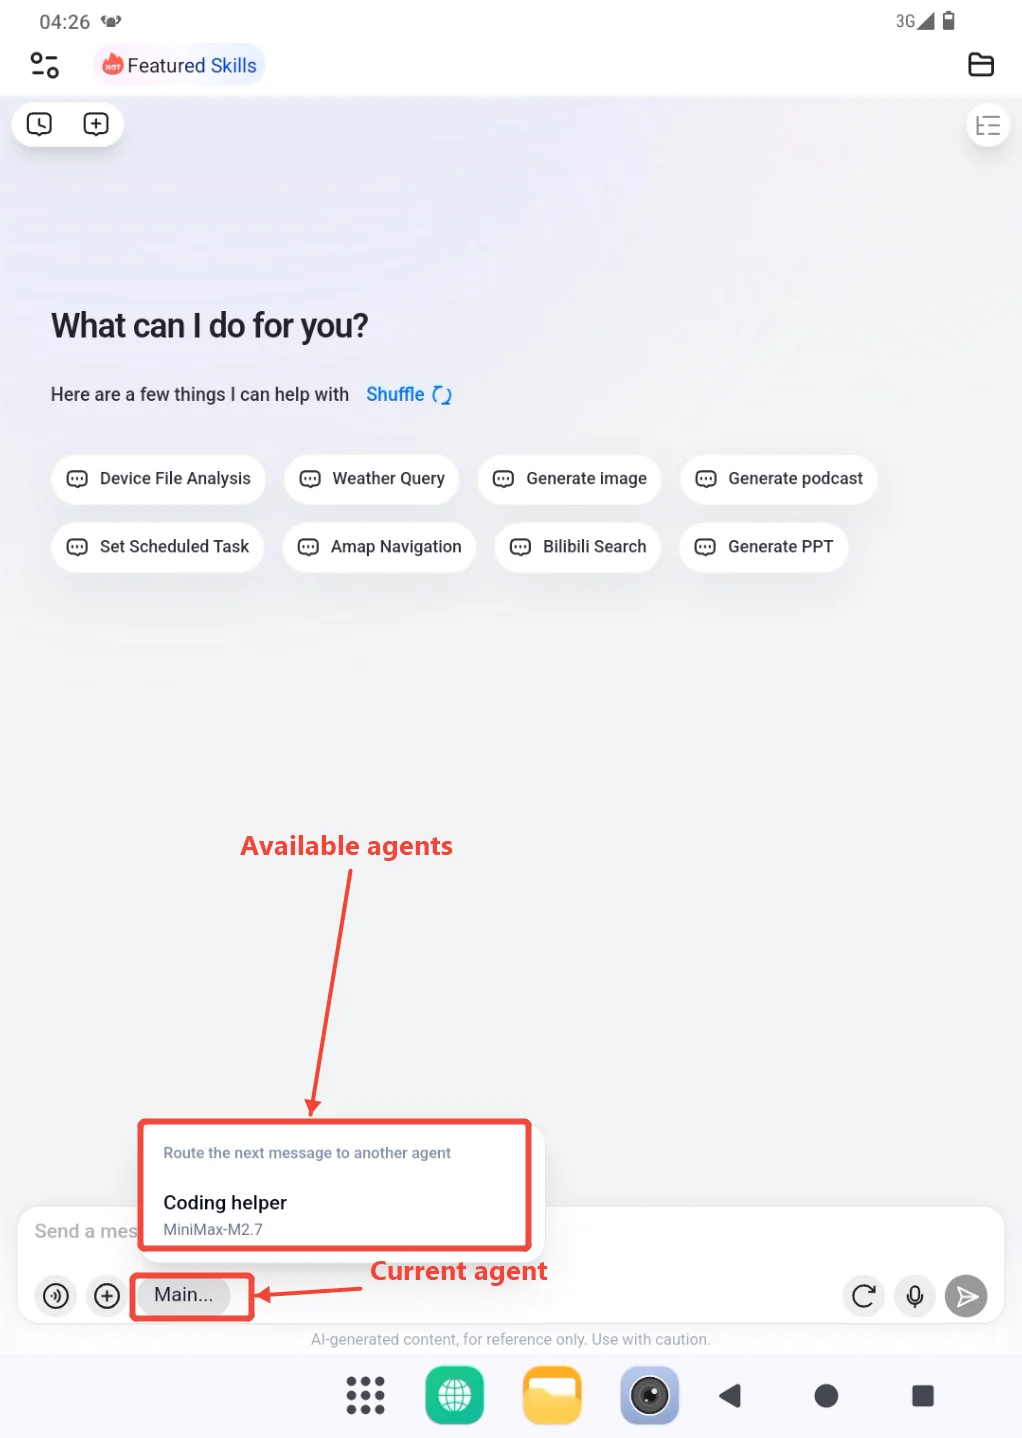
- Enter the task and send it. The selection applies only to that message. Before continuing the conversation, check whether the Agent displayed in the input area is suitable for the next request.
After the Agent receives the message and replies, its conversations appear under that Agent's group in Session History. If this is the first message sent to a newly created Agent, PlugClaw also creates its separate workspace at this point. See Agent Management for workspace location and naming.
 PlugOS — Privacy isn't an option. It's the foundation
Secure, Ad-free, Tracking-free, No Telemetry